
 English
  русский
 عربى
عربى
Industry News
Home / Blogs / Industry News / 28mm Tamper Evident Cap Guide: Sizing, Sealing, and Supplier Selection
Content
A 28mm tamper evident cap performs well when it is matched to the correct bottle finish, applied within a controlled torque window, and molded with consistent bridge and band dimensions. Get those three things right and the result is clear tamper evidence, dependable resealing, and smooth output on high-speed filling lines. Get any one of them wrong, and the symptoms show up downstream as leakers, stripped threads, or a tamper band that will not break cleanly.
A leaker on the filling line is rarely a cap problem by itself. More often, the 28mm tamper evident cap takes the blame while the real issue sits in the neck finish, the capping torque, or the tamper band geometry. For beverage brands and packaging buyers, understanding how this closure actually behaves is the difference between a reliable seal and a costly recall.
At its simplest, a 28mm tamper evident cap is a screw closure with a breakable band attached to the bottom of the skirt. When a consumer turns the cap for the first time, small bridges connecting the cap to the band snap apart. The band stays on the bottle neck as visible proof that the closure has not been opened before it reached the buyer.
The 28mm figure describes the nominal diameter of the screw thread on the bottle neck finish, not the height or overall size of the cap. That thread size dominates single-serve water and many carbonated soft drinks because it strikes a practical balance between comfort in the hand and throughput on the capping line. It also shows up in hot-filled and aseptically filled beverages, where a secure reseal and a visible tamper signal both matter to the brand.
Compared with a plain snap-on closure, the tamper evident design gives retail staff an instant visual check and gives shoppers confidence that the product inside has not been tampered with. For more background on how the mechanism works across formats, see our guide to tamper-evident bottle cap basics.
Two caps can both be labeled "28mm" and still behave completely differently on the same filling line. Before placing an order, buyers should pin down the following specifications rather than relying on the nominal size alone.
ConfirmPCO 1810, PCO 1881, or a short-neck variant.
Matters becauseIt determines thread pitch, sealing surface, and overall fit.
ConfirmMeasured against the bottle finish drawing.
Matters becauseIt affects chucking on the capping head and consumer grip.
ConfirmLined polypropylene versus linerless.
Matters becauseLined caps add oxygen barrier, linerless caps simplify recycling.
ConfirmTypically between six and ten bridges.
Matters becauseFewer bridges break easier, more bridges resist accidental separation.
ConfirmA defined window, not a single figure.
Matters becauseIt keeps sealing consistent across operators and shifts.
ConfirmConsistent gram weight across lots.
Matters becauseIt signals stable resin flow and mold consistency.
Choosing a 28mm tamper evident cap is not just a matter of picking a black or white closure off a catalog page. The cap, the bottle finish, the filling temperature, and the capping equipment all need to work together as one system.
Use the same neck finish profile for the cap and the bottle. A 28mm cap built for one finish can fail entirely on another. The difference between PCO 1810 and PCO 1881 is one of the most common mismatches buyers run into.
Polypropylene remains the standard because of its elasticity and reliable reseal performance. Lined versions add a stronger oxygen barrier for sensitive beverages; linerless versions cut material use and simplify recycling streams.
Check bridge count, bridge depth, and overall band shape before approving a mold. Bridges that are too thin snap during transit and trigger false tamper alerts; bridges that are too thick make first opening genuinely difficult for consumers.
Define a torque window, not just a target number. Torque that runs too low leads to slow leaks after palletizing; torque that runs too high strips threads and makes the tamper band harder to break on purpose.
Once the cap is selected, real-world performance comes down to how consistently it is handled and applied. This is especially true for thin-walled tamper evident caps, where the band geometry is sensitive to capping pressure and to how well the chuck aligns with the cap before torque is applied.
Use a go or no-go gauge to check thread profile, neck diameter, and the condition of the sealing surface.
Adjust torque, compression, and spindle height so the cap seats evenly without deforming the band underneath.
Open a handful of sample bottles by hand and confirm the band separates cleanly and stays on the neck rather than the cap.
Verify removal torque again after warm-up periods, resin lot changes, and unplanned downtime, since all three can shift results.
Separate leakers, cross-threaded caps, and premature band breaks into different categories so recurring issues are easy to trace back to a single root cause.
Before committing to a supplier, verify these points against physical samples rather than a spec sheet alone. A single overlooked detail on the tamper band can turn into leakers, consumer complaints, or a rejected shipment weeks later.
Verify bridge width, depth, and number around the band to confirm breakaway resistance and a visible tamper signal.
The band should stay attached before opening, then stay on the neck after, avoiding false tamper signals at retail.
Check average removal torque and the spread across a sample batch to avoid leakers and overly stiff first openings.
Confirm resin type and whether it suits direct food contact, since this affects taste transfer and durability.
Cap height, outer diameter, and thread profile should stay consistent across production lots.
Test filled bottles with finished caps under shipping conditions to confirm no leakage or band damage.
For still water and lightweight retail packs, a standard 28mm water bottle cap remains a proven and cost-effective solution. It gives consumers a familiar opening experience and keeps sorting simple on fast capping lines. It suits products that do not need high internal gas pressure or a strong oxygen barrier particularly well.
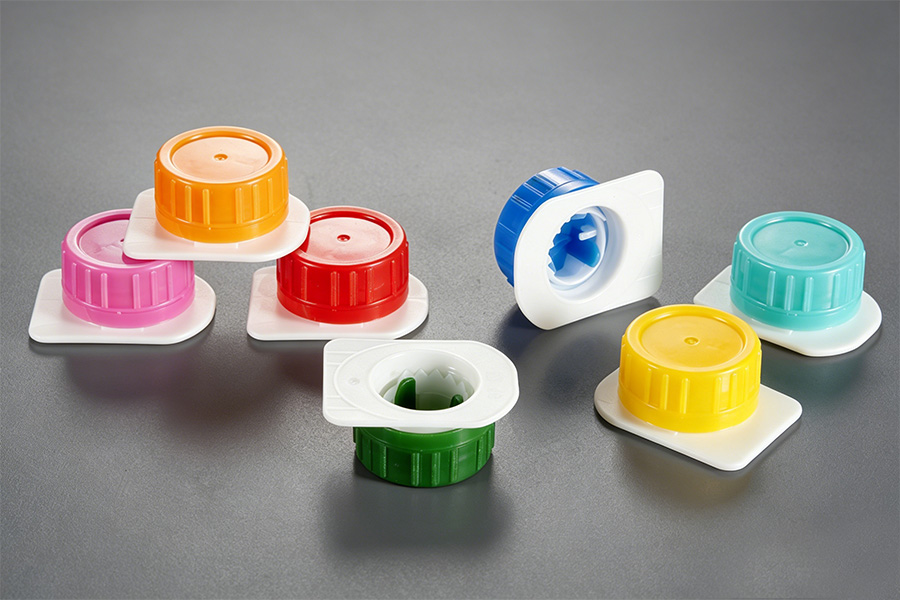 28mm Tamper-Evident Screw Caps for PET Water BottlesThis cap fits standard 28mm PET bottle necks, supporting PCO 1810 and PCO 1881 finishes. Its tear band provides clear tamper evidence, making it a practical choice for still water and lightweight beverage packaging lines.View Product →
For juice, dairy, and liquid food products in carton packaging, the same tamper evident principle shows up in screw caps built for aseptic filling. Those caps typically use a wider mouth and a different sealing surface, because the packaging material and the filling conditions are not the same as a rigid PET bottle.
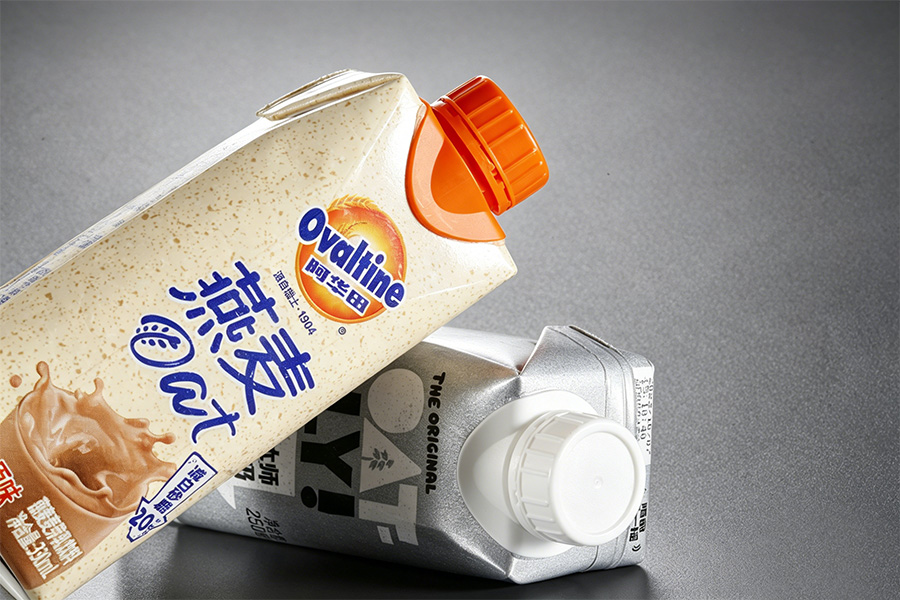 Screw Caps for Aseptic Carton Juice PackagingDesigned for carton-based juice and liquid food products, this cap uses food-grade PP and suits aseptic filling environments. It offers reliable resealing after opening while maintaining tamper evidence through the one-time tear band.View Product →
Yes, it can be screwed back on for resealing, but the broken band remains visible as proof that the package has already been opened once. The tamper evidence itself only works as a one-time signal.
Run a drop test and a transport simulation using the actual filled bottle, cap, and outer packaging together. Check for band separation, leakage, and any shift in removal torque after the test cycle.
No. Both may share the 28mm dimension, but the cap still has to match the exact finish profile, including thread pitch and sealing surface shape. A cap built for one 28mm finish format can be a poor fit on another.
Different resin lots can shift how the cap flexes under the same torque setting, even when the dimensions look identical on paper. Rechecking torque and running a manual band test after any lot change usually catches this early.
A lined cap has a separate sealing disc inside the top, which improves the oxygen barrier for sensitive beverages. A linerless cap seals directly with a molded ring on the underside of the cap, using less material and simplifying recycling.
Most 28mm tamper evident caps use somewhere between six and ten bridges. Fewer bridges make the band easier to break but more prone to snapping during rough handling, while more bridges improve durability at the cost of a stiffer first opening.
If you have any questions, please fill out the contact form at the bottom of the page and contact us.
© Lile (Taizhou) Technology Co., Ltd.
Toudao Town, Taizhou City, Zhejiang Province, China.
liletz@163.com
+8613706571648